1.
From the
Tableau Home page or Explore screen, click the ![]() (open)
button to open the “New” drop-down menu.
(open)
button to open the “New” drop-down menu.
2.
Open the
“New” menu and click to select Workbook.
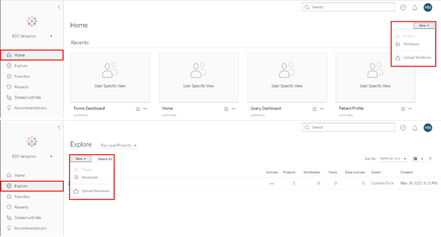
Figure 96: Create a New Workbook
a. The Connect to Data tab opens in the browser.
3.
Select the
Connectors tab.
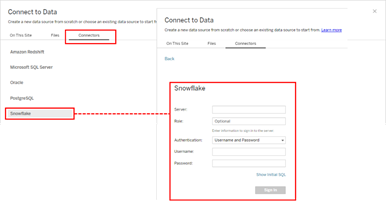
Figure 97: Connect to Data
4.
Populate
information in the fields and use the drop-down menu to select an
Authentication option.
5.
Click the Sign
In button.
6.
Use the
drop-down menus to select Warehouse and Database.
a. Additional menus may display based on
selections you make.
7.
Make
selections as needed.
8.
Use the Save
button or select Save or Save As in the File menu.
9.
The screen
displays the creating report options in tiles by category.
10. Refer to the Appendix for additional information and details about
creating and managing your Workbook(s).
|
SAVE your configurations and settings OFTEN. To protect data integrity, this system will TIME OUT after a period of inactivity. When a system timeout occurs, unsaved settings and changes are NOT retained.
|
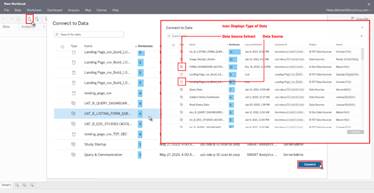
Figure 98: Examples of Screens and Elements that May Display
Related Topics
